Use the Quick Check window to enter information for vendor and payroll checks which will be printed. Transactions which will be used to create an ACH file are entered in the window. After-the-fact Payroll checks and automatic withdrawals should also be entered here.
This window is NOT intended to be used to record banking transactions for writeup purposes. The Write Up>Checks window is designed for heads down entry of data received from clients.
Select Activities>Quick Check.
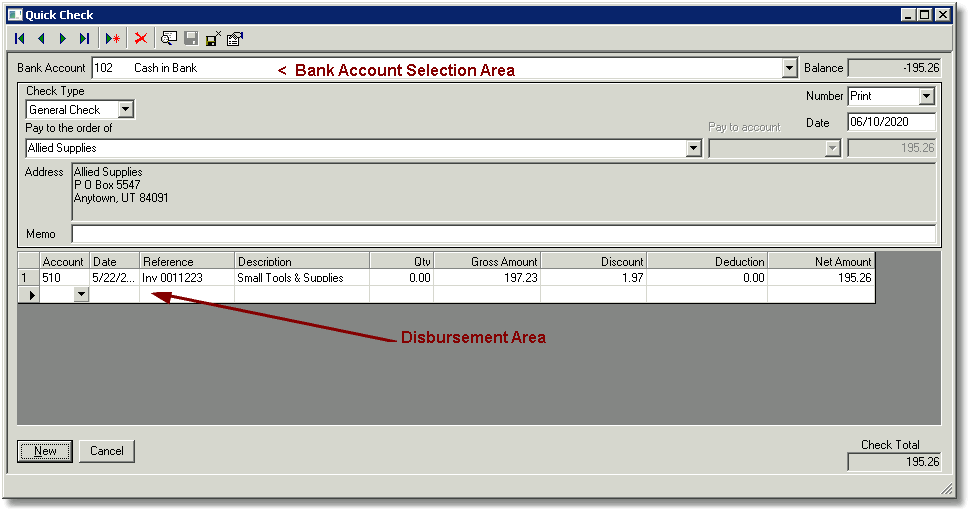
Bank Account Selection Area
This is the area at the top of the window under the Data Bar.
-
Bank Account—Select the bank account that checks will be entered to. Checking Type accounts will always appear in the drop-down list.
-
Balance—This shows the balance in the selected bank account.
Check Area
This area is in the center of the window in a check format.
-
Check Type—Select the type of transaction from the list.
- Choose General to record a general check.
- Choose Payroll to record time or salary for an employee. The system will calculate taxes
and deductions as defined.
- Choose Payroll (ATF) to record a payroll check that has been manually calculated and written.
-
Number—Leave the entry for check number as Print for checks that will be printed. Select EFT for payments that will be made by electronic funds transfer or ACH. Enter the actual check number to record a manual check.
-
Date—Enter the date of the check.
-
Pay to the order of—Select the payee from the drop-down list, or start typing until the correct payee appears, then press Enter or Tab to accept.
- If you enter a payee that does not have a record in the Contact Manager, a dialog box will open asking if you want to add the contact if you have that setting selected (found by clicking the Options
 icon). Click Yes to add a new contact record for the payee. If the setting for Edit New Contacts is set to Yes, other information can be added for the new contact. If you click No, the payee's name will be removed from the Pay to the order of field. It is not possible to enter a check with a Pay to the order of name that is not a contact.
-
Pay to Account—This field is only available when EFT has been selected. Choose the desired Bank from the drop-down list. This list will be populated with the Lookup of any account set up on the Bank tab of the selected Contact.
-
Unlabeled box—The box to the right of the Pay to account field is the total of the check. It functions differently depending on the value for the Validate Amount option.
-
Yes—When set to Yes, the total of the check must be entered. The total disbursement of the check must equal the amount that was entered in this box before the check can be completed. You can complete a check by clicking New, or by moving to the next or previous check.
-
No—When set to No, this box is not editable. It will display an automatic calculation for the total of the check.
-
Memo—Enter the memo information for the check. You can choose to skip this field during processing by selecting this setting in the Options window.
Disbursement Area
The Disbursement Area is the grid in the lower portion of the window. It is used to post the check to one or more General Ledger account. Columns can also be hidden from view and rearranged using Column Configuration.
Lower Portion of Quick Check Window
-
New—This button saves the current check and clears the window so you can enter the next check.
-
Cancel—This button opens a dialog box allowing you to save the check or cancel any changes.
-
Check Total—This field displays the calculated total of the check.
Quick Check Options
Click the icon on the Data Bar, or select Edit>Commands>Screen Options when the Quick Check window is open.
Quick Check Client Tab—The Quick Check Client tab contains options that only apply to the current open client.
Quick Check System Tab—The Quick Check System tab contains options that apply to all clients.
Default Move (System)
-
Default—The window will always open to a new transaction.
-
First—The window will always open to the first transaction for the period covered (see Options>View Period) in numeric order.
-
Last—The window will always open to the last transaction for the period covered (see Options>View Period) in numeric order.
-
New—The window will always open to a new transaction.
Always Ask Before Saving (System)
-
Yes—A dialog box with the options Yes, No, or Cancel will open before the system advances to a new check.
-
No—The current check will be saved automatically when advancing to a new check.
Ask Before Adding Contacts (Both)
-
Default—Uses the setting from the System tab.
-
Yes—When a name is entered in the Pay to the order of field that does not match the Lookup for any contact in the Contact Manager, a dialog box will open asking if you want to add the contact. If you click No, the name in the Pay to the order of field will be cleared since a check cannot be saved without having a payee name recorded in the Contact Manager.
-
No—When this is set to No, a new contact will automatically be created for the name entered. The Lookup and Display Name in the Contact Manager will contain the information entered in the Pay to the order of field.
Exception: If the user does not have permission to access the Contact Manager, a new contact will not be added, and the check will not be saved, since the payee is not a current contact.
Edit New Contacts (Both)
-
Default—Uses the setting from the System tab.
-
Yes—Opens the Contact Manager window so that information in addition to the Lookup and Display Name can be filled out for the new contact.
-
No—The Contact Manager window will not open when a new contact is created.
Exception: When the user does not have permission to access the Contact Manager, the Contact Manager dialog box will not open, and the check will not be saved, since the payee is not a current contact.
View Period (Both)
This setting controls which checks will be displayed in the List  . It also controls which checks can be accessed in the window when using the Data Bar commands to scroll.
-
Default—Uses the setting from the System tab.
-
Accounting Year to Date—Includes all checks for the current accounting year.
-
All—Includes all checks.
-
Current Accounting Period—Includes all checks within the current accounting period.
-
Last 30 days—Includes all checks within 30 days up to the current date.
-
Last 60 days—Includes all checks within 60 days up to the current date.
-
Last 90 days—Includes all checks within 90 days up to the current date.
-
Last Year—Includes all checks in the last calendar year.
-
Year to Date—Includes all checks in the current calendar year.
Edit Mode (Both)
-
Default—Uses the setting from the System tab.
-
Bank—Opens the fields shown below in the General Check grid.

-
Payable—Opens the fields shown below in the General Check grid.

View By Bank Account (Client)
-
Yes—When set to Yes, only checks written on the bank account selected at the top of the window will be shown in the List or in the window when scrolling through checks using the icons on the Data Bar.
-
No—When set to No, all checks written on any bank account will be shown in the List or in the window when scrolling through the checks using the icons on the Data Bar. When scrolling, the Bank account will change to match the account that the check was written on.
Validate Amount (Both)
-
Default—Uses the setting from the System tab.
-
Yes—When set to Yes, the total of the check must be entered in the box to the right of the Pay to the order of field, and the total of all rows in the disbursement grid must equal the amount entered in this box for the check to be saved.
-
No—When set to No, the box to the right of the Pay to the order of field is not editable. It will display an automatic calculation for the total of the check.
Skip Contact (Both)
-
Default—Uses the setting from the System tab.
-
Yes—Causes the cursor to skip over the Contact field when pressing Enter or Tab to move through the window. The Contact field can still be accessed with the mouse.
-
No—Causes the cursor to stop in the Contact field when pressing Enter or Tab to move through the window.
Skip Date (Both)
-
Default—Uses the setting from the System tab.
-
Yes—Causes the cursor to skip over the Date field when pressing Enter or Tab to move through the window. The Date field can still be accessed with the mouse.
-
No—Causes the cursor to stop in the Date field pressing Enter or Tab to move through the window.
Skip Memo (Both)
-
Default—Uses the setting from the System tab.
-
Yes—Causes the cursor to skip over the Memo field when pressing Enter or Tab to move through the window. The Date field can still be accessed with the mouse.
-
No—Causes the cursor to stop in the Memo field pressing Enter or Tab to move through the window.
Remember Date (Both)
-
Default—Uses the setting from the System tab.
-
Yes—Defaults to the date of the last check written.
-
No—Defaults to today's date.
Use Company Date (Both)
-
Default—Uses the setting from the System tab.
-
Yes—The program will use the Pay Period and Check dates from the Pay Pd Start Date, Pay Pd End Date, and Payroll Check Date fields on the Company Payroll Defaults tab in Setup>Company Information.
-
No—The Pay Period and Check dates will have to be entered for the first check of the session.
Default Discount Account (Client)—Select the account that will be selected in the Discount Account field when the Quick Check window opens.
-
[Specific Account]—A list of accounts will appear. Select one of them to be the Discount Account used when a discount amount is entered in Create Payable Checks without an account.
-
Default—When Default is selected, a Discount amount entered in Create Payable Checks with no discount account will post to the account that the original invoice posted to.
Default Checking Account (Client)—Select the account that will be selected in the Bank Account field when the Quick Check window opens.
-
[Account#]—When a specific account is selected from the list of Checking type accounts, the window will always open with that specific account selected for the Bank Account.
-
Use Select Account Window—When this is selected a dialog box will open displaying all Checking type accounts. Select the desired account and click OK.
-
Last—When Last is selected, the window will always open to the Bank Account that was used last.
Fed ATF Tax Mode—After-the-fact payroll only (Both)
-
Default—Uses the setting from the System tab.
-
As Entered—The system will save ATF payroll checks as entered without checking or correcting Social Security or Medicare withholding taxes.
-
Prompt—The system will compare Social Security and Medicare Withholding taxes entered to what should have been withheld. If there is a discrepancy, a window will open showing what was entered and what should have been withheld. The check may be saved as entered or edited.
-
Auto Correct—The system will adjust the Social Security and Medicare to the correct amounts, if necessary, and will adjust any discrepancy through Federal Withholding for reporting purposes only.
State ATF Tax Mode - After-the-fact payroll only (Both)
-
Default—Uses the setting from the System tab.
-
As Entered—The system will save ATF payroll checks as entered without checking or correcting state unemployment or disability withholding taxes.
-
Prompt—The system will compare state unemployment or disability withholding taxes entered to what should have been withheld. If there is a discrepancy, a window will open showing what was entered and what should have been withheld. The check may be saved as entered or edited.
-
Auto Correct—The system will adjust the state unemployment or disability withholding to the correct amounts, if necessary, and will adjust any discrepancy through state withholding tax for reporting purposes only.
Warn when date not in period (Both)
-
Default—Uses the setting from the System tab.
-
Yes—A warning in a dialog box will open if a check is being saved with a date that is not consistent
with the period.
-
No—A date warning will not open.
Enter Time Mode (Client)—Use Enter Time Mode if the employees' time is in hours and minutes rather than hours and fractions of hours. The Qty field will automatically show the hours in fractions of hours based upon the Time entered.
-
Hours And Minutes—Enter the time, separating the hour from the minutes with a decimal point. One hour and 25 minutes should be written as 1.25.
-
Minutes—Enter total number of minutes.
Wage Check Mode (Client)—The program will test an employee's payroll check with tips to ensure that the employee is receiving minimum wage. Their hourly wages plus tips should bring the employee to at least minimum wage.
-
Add to Other—The program will automatically increase the Other Income item on the check to bring the employee up to minimum wage.
-
Add to Tips—The program will automatically increase Tips to bring the employee up to minimum wage.
-
Add to Wages—The program will increase the hourly rate to bring the employee up
to minimum wage.
-
Ignore—The program will save the check as entered, without verifying minimum wage.
-
Prompt—The following dialog box will open if the check does not meet minimum wage.
- Click Add to Pay to increase the pay.
- Click Add to Tips to increase the tips.
- Click Add to Other to increase the Other Income amount on the check.
- Click Ignore to save the check as entered.
- Click Return to Edit to go back to the data entry window.

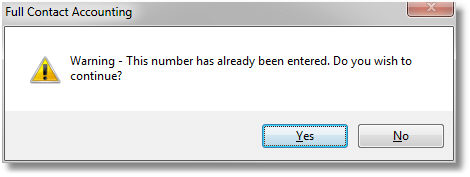
Warn Duplicate Check (Both)
-
Default—Uses the setting from the System tab.
-
Yes—The following dialog box will open if the system tries to save a check with a number that has already been used.
-
No—The program will save a check with a duplicate check number without a warning.
EFT Clearing (Client)
-
[Specific Account]—A list of accounts will appear and one of them may be selected to be the default EFT Clearing if a general check is created with the number EFT.
- None
Minimum Wage (Both)
Enter the minimum wage that applies to most clients on the System tab.
-
Default—Uses the setting from the System tab.
-
[Specific Amount]—Enter an amount on the Client tab only if the minimum wage for this client is different from the amount on the System tab.
Use Avg Wage for OT (Client)
-
Yes—The program will use the average hourly rate for an employee with multiple hourly rates on the active check when calculating overtime pay.
-
No—The program will use the hourly rate for the current department when calculating overtime for an employee with multiple hourly rates on the active check.
Show Employee Hash Total (Both)
-
Default—Uses the setting from the System tab.
-
Yes—The program will display the sum total of all employee numbers (the numeric characters to the left of the first space in the Contact Lookup) on checks entered in the current accounting period at the bottom right side of the window.
-
No—Employee Hash Totals will not be displayed.
Show Gross Pay (Both)
-
Default—Uses the setting from the System tab.
-
Yes—The program will display the sum total of all Pay and Other Income items entered on this check at the bottom right side of the window.
-
No—Gross pay will not be displayed.
Show Total Hours (Both)
-
Default—Uses the setting from the System tab.
-
Yes—The program will display the sum total of Qty for all Pay items entered on this check at the bottom right side of the window.
-
No—Total Hours will not be displayed.
Prevent Posting General Check to AP Account (Client)
-
Yes—The program will not allow a check to be saved if a detail item posts to an Accounts Payable account.
-
No—Checks with amounts posting to Accounts Payable accounts may be saved.
Comments
0 comments
Article is closed for comments.